Auto Login Bank Account using Python
Whenever I want to check my HSBC bank account, it requires me to input the first password and some random bits of the second password. However, I always mistakenly fill the wrong password which results that I have to input the information again which is tedious. And what’s serious is that if you input incorrect passwords for more than 3 times then your account will be locked until you unblock it via the passcode authentication. Therefore, I want to automate the login process so that I don’t have to deal with.
After google, I found the most convenient way to implement should be using python with Selenium librarsy. So in this tutorial, I will use python and selenium to implement and following packages are all I need.
Selenium (See the installation guide and introduction of Selenium)
o let’s begin our tour to auto login the HSBC e-banking account.
We will perform the following steps to auto login the website:
- Extract and study the details in the webpage that we need for the login
- Perform login to site
Step 1. Study the website
To login my HSBC e-banking account, it requires me fill the username first and end up in another page to input the first password and some bits of your second password i.e., 2-way authentication.

Check the details that we need to extract in order to login
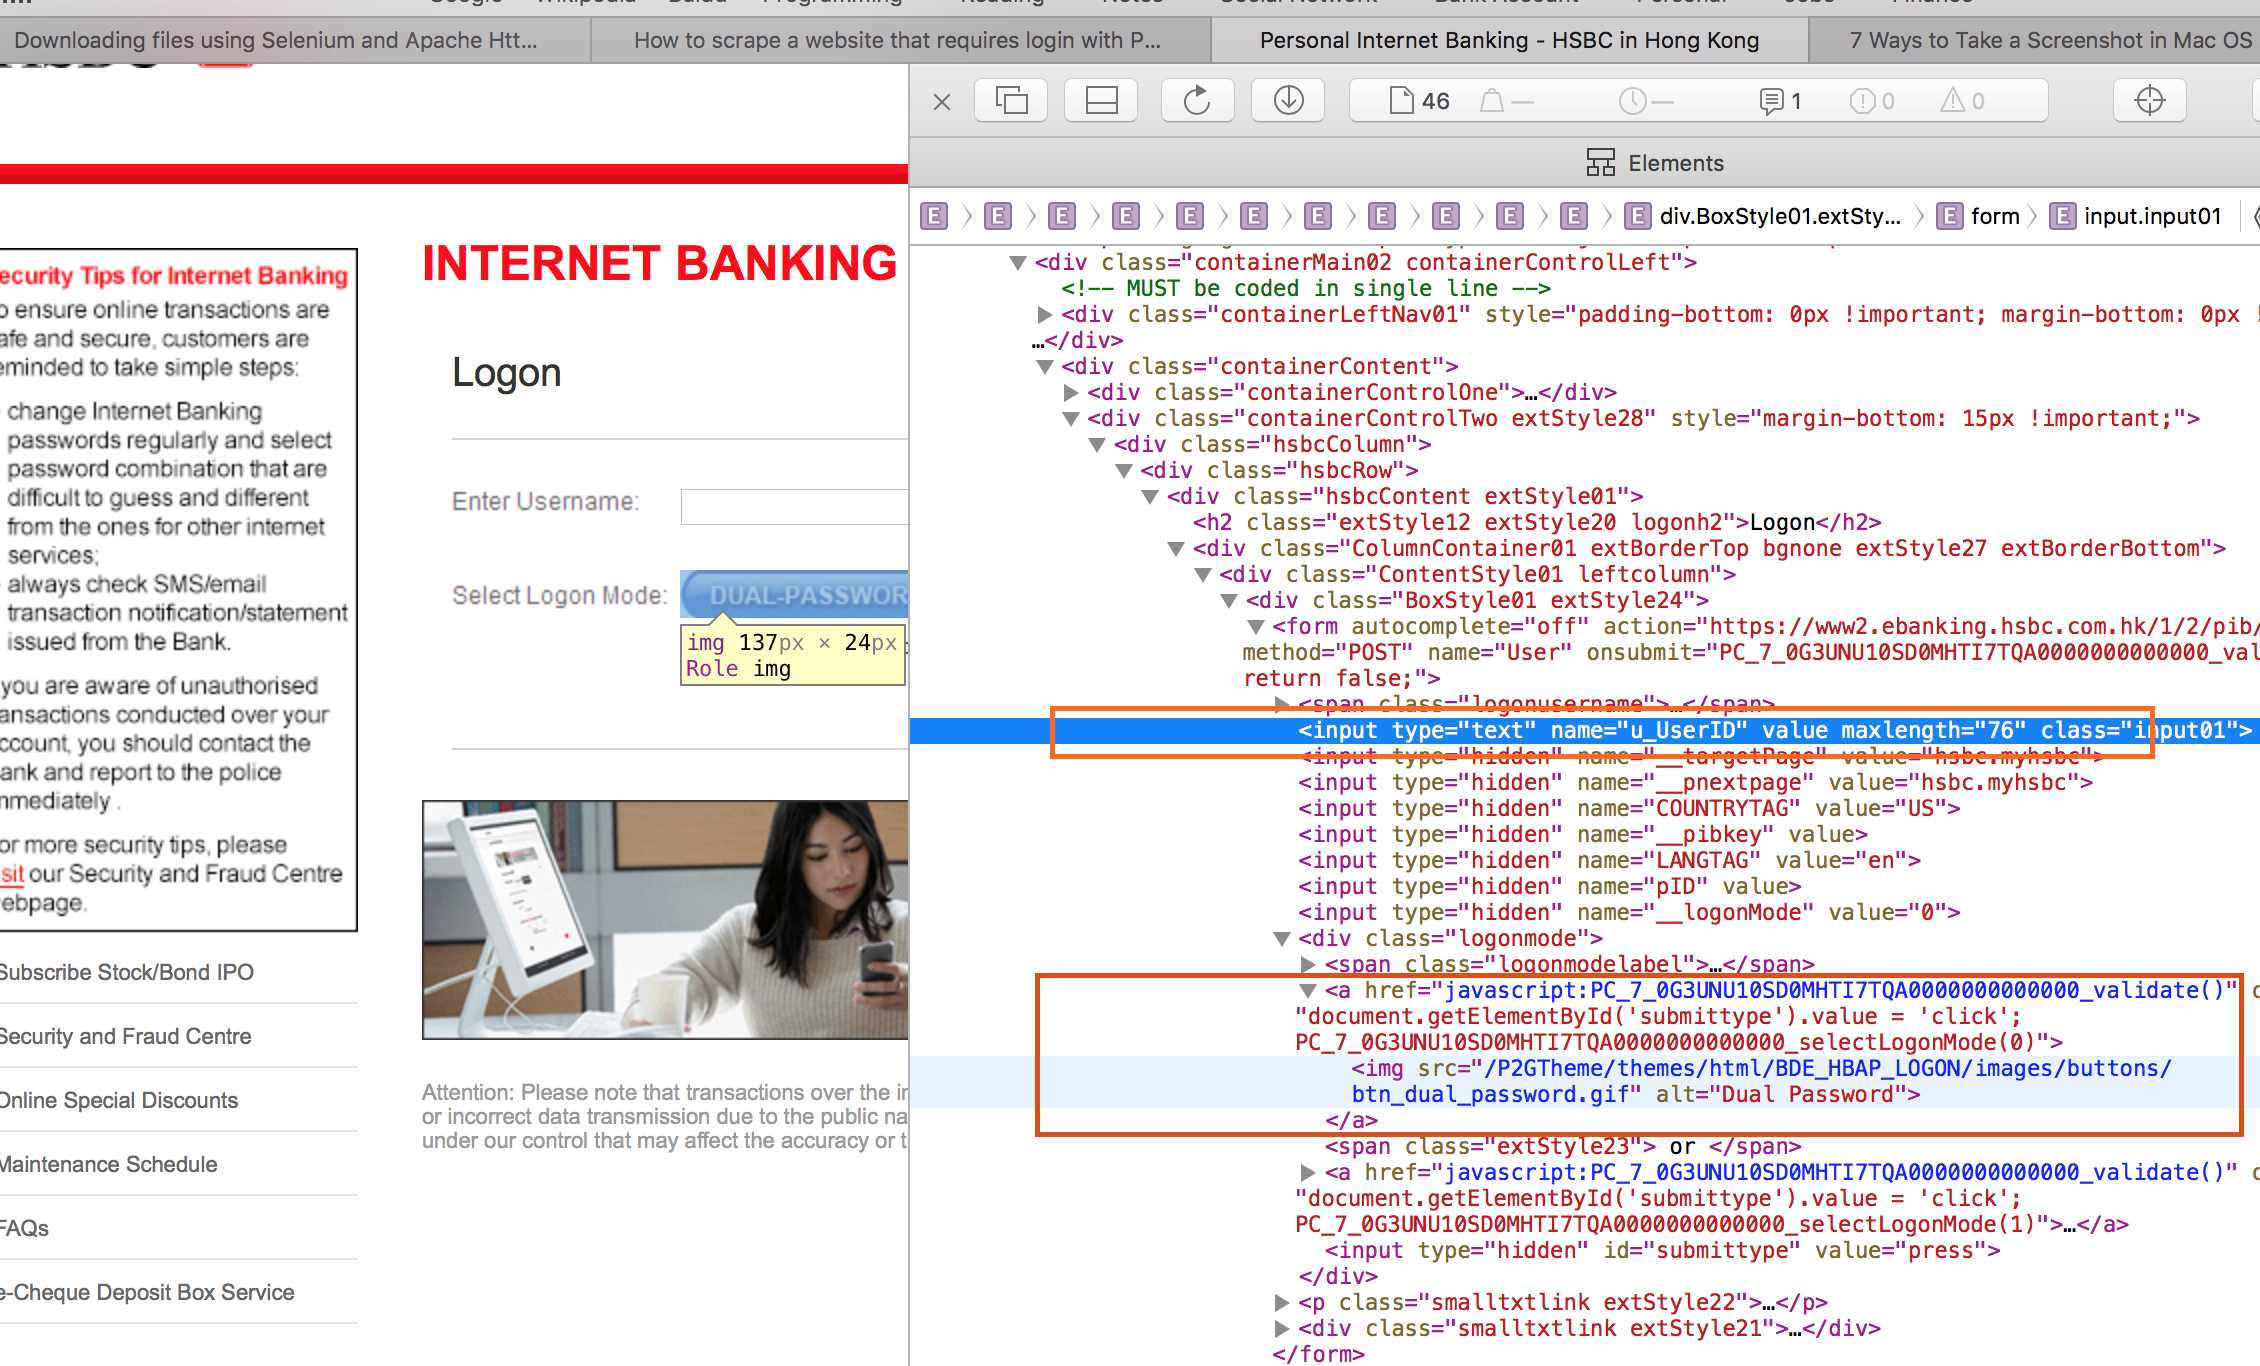
In the first login page, we have to fill the username and click “Dual Password” to proceed.

With the help of browser safari (chrome is more recommended), we can inspect the page source so that to analyze the site. By right click the user name field and select “inspect element” we can find this input which the value of the “name” attribute is “u_UserID”. Therefore I can fill the input field with my account name using selenium send_Keys api. Apply the same principle, find the element “Dual Password” and perform the click action via its native method “Click”. Note, some times we may get multiple elements by just one criteria and by default selenium will just return the first element to us. Therefore we can consider to use “find_element_by_xpath” which could guarantee the uniqueness.
Code implementation:
# find username input
usr_name_input = driver.find_element_by_name("u_UserID")
usr_name_input.send_keys("your_user_name")

# submit the form (although google automatically searches now without submitting)
submit = driver.find_element_by_xpath("//a[@href='javascript:PC_7_0G3UNU10SD0MHTI7TQA0000000000000_validate()']")
submit.click()
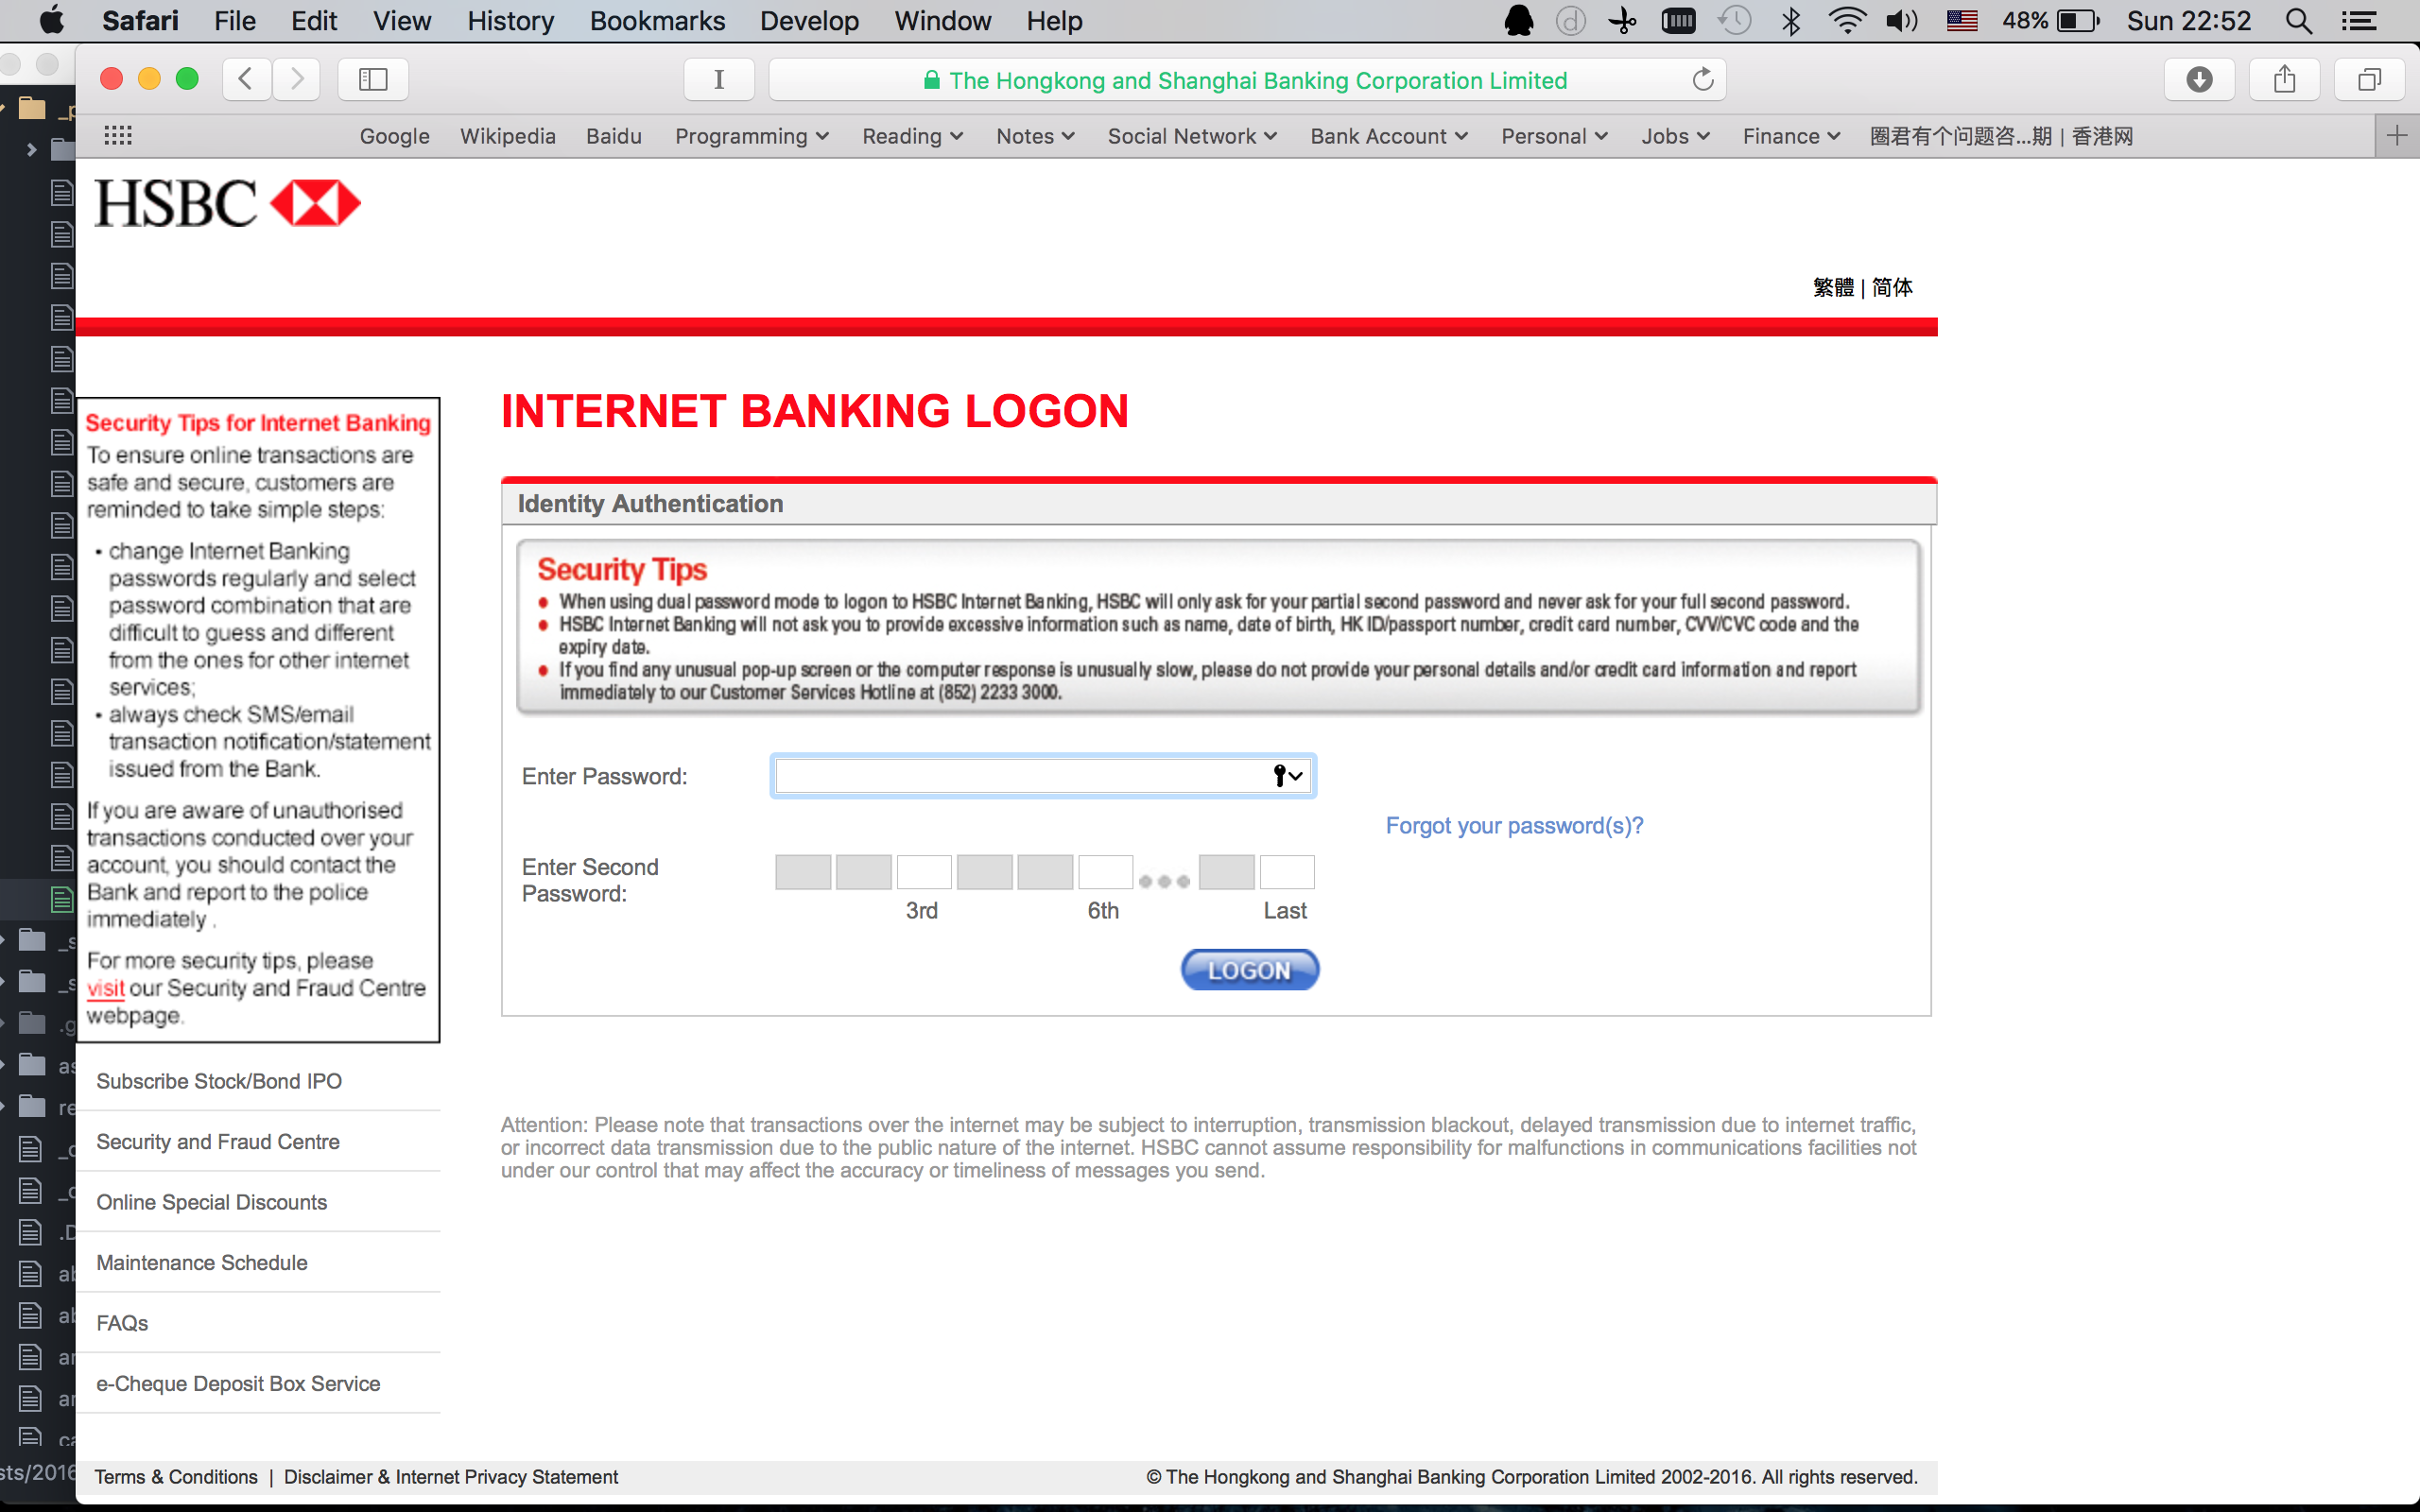
Now that we should reach the page which requires us to fill the password.

For the first password, by “find_element_by_xpath” method we can get the control of the element and use send_keys api to fill the password. For the second password, the key solution is to find out the index so that we can get the field by traversing the array and fill it to the element. Having observed the second password I found the trick that some fields are omitted represented by 3 dots so that the index after will be denoted by “xxxlast” (xxx is the reversed index) or “Last” (if the first last).
Code implementation:
# now we are on the password input page and fill the first password
firstPassword = driver.find_element_by_name("memorableAnswer")
firstPassword.send_keys("your_first_password")

# find the index
all_secondPassword = []
all_secondPassword = driver.find_elements_by_xpath("//td[@width='28']")

valid_sec_pwd = []
i = 0
for secondPwd in all_secondPassword:
    sec_pwd_input = secondPwd.find_elements_by_xpath(".//label[@for='code']")
    if(len(sec_pwd_input) > 0):
        index_str = sec_pwd_input[0].text
        print("index_str: " + index_str)
        if(len(index_str) < 10):
            if 'last' in index_str or 'Last' in index_str:
                if (index_str == 'Last'):
                    index = len(sec_pwd) - 1
                else:
                    index = len(sec_pwd) - int(index_str[0])
            else:
                index = int(index_str[0])
            valid_sec_pwd.append(sec_pwd[index])
            print(valid_sec_pwd[i])
            i += 1
    else:
        print("Not required field")

# fill the second password
j = 0
while (j < 3) :
    sec_pwd_name = 'RCC_PWD' + str(j + 1)
    field = driver.find_element_by_name(sec_pwd_name)
    field.send_keys(valid_sec_pwd[j])
    j += 1
Step 2. Perform the logon action
Well, it is almost done as we have filled all the required information! The last step is to click the “Logon” button and if successfully authenticated, we should see the bank account page.
Code implementation:
# press logon

logon = driver.find_element_by_xpath("//input[@src='/P2GTheme/themes/html/BDE_HBAP_LOGON/images/buttons/btn_logon_png.gif']")
logon.click()
So far, we can automate the login process without inputing username or password which may save you from the login pain.
For the integrated codes please find in the repo.